Wednesday, 5 February 2014

Paper Beads

Sustainable Crafts: From Recycled Materials
Well, it is the start of the latest Bedwas Adult Education Centre course and I say... making jewellery doesn't need to be a difficult and expensive endeavour, it can just be fun and imaginative. Kids love drawing, painting, colouring and glueing bits and bobs for a reason..they enjoy doing it! This is where we will start on our journey towards gaining accreditation in this recycling unit. By using things that can be found all around us, we can become more creative and try out ideas that using precious materials may not allow. The jewellery produced can be highly wearable designs or prototypes of ideas that can be further developed for other, more traditional materials.

Tapered Paper Beads
I'd not had a  go at making paper beads for many years and so I took a  tour of You Tube and Pinterest (click for my board of Paper Projects & Upcycled Projects) to get me pointed in the right direction. There are great ideas on these for anyone wanting to make a serious venture into this particular craft. Templates for different shaped beads are online as well as useful tools and materials such as bead rollers, glues and varnishes. We however are going to keep things very simple and cost effective and use household items wherever possible to create our beads.
 
Step1

 Gather your paper. I had a wide selection of pretty, printed paper sheets in my collection but using magazines or thick wrapping paper is a great idea for cheap bead making.
Step 2

 Choose your sheet and using a craft knife, cutting board and steel rule, cut the paper into long, narrow strips in a  triangle shape. The finished bead size will be determined by the width at the bottom and length of sheet. For my gold beads I measured 3cm at the base, length approx 30cm.
Step 3
Repeat to make as many beads as needed
Step 4
In place of a professional bead roller tool, use masking tape to secure x 2 metal skewers together leaving approx 2 1/2 inches at the top to make the beads.
Step 5
Slot the wider section of one strip between the skewers, dab some glue to secure, and begin wrapping the strip tightly around the two skewers.
Step 6
Keep rolling, keeping it tight to avoid undoing.
Step7
Continue wrapping until just the narrow section is left, secure with small amount of glue. I've used a  water based PVA glue that is white but dries clear. I found it more than up to the job and as it is popular as a glue for kids, easy to locate. Specialist glues and varnishes are available, research online for card making suppliers (some jewellery suppliers like The Bead Shop also stock selected items) to learn about Diamond Glaze and Mod Podge, brand names for combined glues and glazes.

Step 8
Once secure, remove bead from the metal skewers and transfer to a single wooden skewer. Use this to first ensure the folds inside sit neatly. 
Step 9
 Use a  paint brush to coat the whole bead and leave to dry. Try experimenting with nail varnishes to add interest. I used a subtle gold nail enamel to coat some of the beads and a clear one to give them a more solid finish.
Alternative Idea
For added interest to the bead, carefully paint black nail varnish along edges of the strips before rolling. Leave to dry and they will give the finshed bead a different effect. Coat with clear varnish to finish.
Finished bead selection

Finished necklace design
I added gun metal & gold plated beads to the paper beads, creating links with gold plated wire. I drew a rose with a gold marker pen onto black shrink plastic for the pendant and added an orphan bead to give the necklace some weight.
Tube Bead Shape
 For a tube bead shape, cut your paper into long strips, my measurements were 4cm width, 30cm length
 Use same techniques as shown in steps 5, 6 & 7 above.


Paint the edges with coloured nail varnish.
Finished Necklace
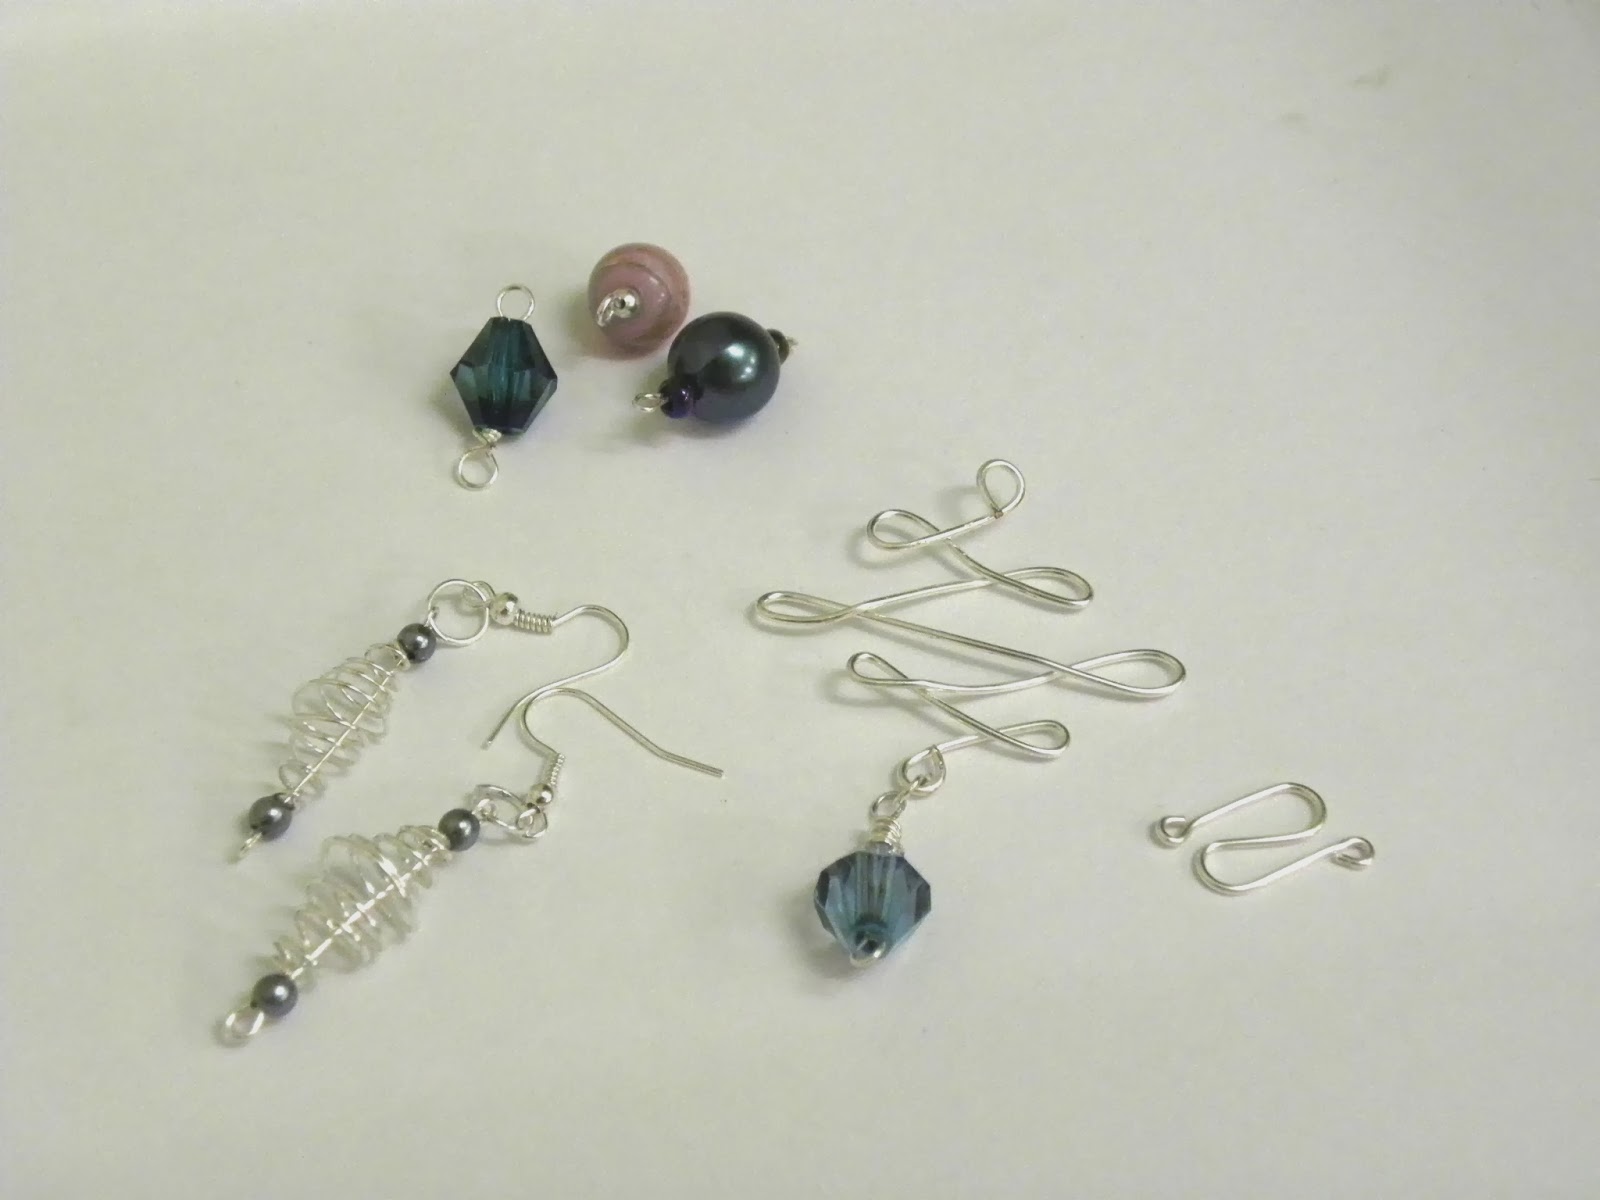
I used gun metal beads and silver plated wire to create links of the paper beads, added pretty metal beads as spacers and a  handmade 'messy' wire bead as a pendant.
Shrink Plastic
 Our other projects will include using Shrink plastic and I can't wait to see what everyone manages to make! Most craft suppliers have shrink plastic (brand named 'shrinkles' I believe) sheets on sale, try Hobbycraft and The Range who both usually stock a selection of colours. I like the basic , frosted one best and  this works well with stamped designs. The brand ink Stazon is best for not 'bleeding'. The thing to remember with shrink plastic is...it shrinks!! Obvious maybe but until you've seen it, it's hard to comprehend just how much it shrinks. So. any design needs to take into consideration that it will shrink approximately 7 times smaller. Also remember to punch your holes before heating. Sharpie pens, pencils and other colourants can be used to decorate your plastic before heating. Shrink plastic can be heated in a conventional oven ( follow manufacturer's instructions for use) or heated with a craft  heat gun. Ensure you do this over a  heat resistant surface (also cover with foil) and take safety precautions to avoid potential fire or heat damage to surrounding area...and yourself!!

Wednesday, 27 November 2013

Lifestyle Course: Learner's Work

We are coming to the end of the latest Lifestyle Course at Bedwas Adult Education Centre and so it is time to showcase some of the work carried out by the learners.
Most of the ladies attending the course were beginners in wire and basic jewellery making but all had craft or beading experience that helped develop their skills quickly.
Steph was the most experienced of the group and her jewellery shows how practising and adapting basic techniques to your own designs can produce stunning results.
Steph's brief was to produce an earring design that incorporated 3 different techniques we had covered. Creating a wrapped bead link and using coiling & spirals, she fulfilled this perfectly.
Taking the design further, she included delicate wire weaving too
Using her own designs and ideas, Steph has put her pliers and tools to great use to make a lovely toggle clasp and a kilt pin!
 We covered making wire rings using a  mandrel and wrapping free-form stones & sea glass to produce pendants like these two by Steph.
Hammering 1.5mm wire on a mandrel gave Steph this simple but effective finish to a simple ring.
                                                  
Tobia is very interested in working with silver and has been practising wrapping a variety of stones in different styles. The 'plaiting' idea was her own and came from watching tutorials online. It was the  perfect choice for this uneven turquoise stone.

  Coiling wire on skewers has been used to excellent effect here for Tobia's earrings design and necklace.
Viv made a  lovely job of this wire ring design, combining the copper coloured 
wire with a  faceted black bead.
For the wire earring project, Viv experimented with thinner wire to create heart droppers. The pretty faceted, smoke beads give them a vintage look, which was another part of the brief.
Viv has embraced all aspects of jewellery making and has been busy making lots of designs away from class. A simple wire bangle has been transformed with black thread and beads.
Viv is currently working on  an elaborate animal wire brooch (could be an owl or may be a cat...she hasn't quite decided yet!) but she started with this lovely dragonfly design.

 Wire wrapped pendants by Viv and earrings showing the use of flat nosed pliers,
to create sharp corners in the wire and producing a triangle effect. 
When tackling a design like this, forward planning is essential so the bead placement is perfect.

For the upcycling project, Viv designed and made this fantastic necklace. Re-purposing a cotton reel, she painted and covered it with floral material then used the same to make her own rolled, tube beads. Pulling the design together by choosing a bead palette of pastel pinks and greens, she cleverly chose black metal findings and chain to give the necklace definition.
Laura came to the class a few weeks in and has worked really hard on mastering the basic techniques quickly before progressing to finished designs. She has been playing around with wire to create loops and swirls for links.
Laura's upcycling & vintage project design is gorgeous and  incorporates at least three of the basic techniques of looping, spirals and attaching links.
Despite never having lifted  a tool before the class, Kathy has shown a real talent for both the design and making of her jewellery. She has made a selection of wire wrapped pendants and rings using the techniques shown in class.
 Kathy's upcycling/vintage project piece is a fabulous mix of charms, beads, chain and pendants. She used books to research up-cycled jewellery and created a mood board of ideas before setting on her task.The layered look is a success and the colour choices ideal. By identifying areas she felt weren't working so well, Kathy thought the concerns through before re-working the button features.
Kelly made an elegant '20s style necklace for the upcycling/vintage project. The perfect placement of the pearls was a challenge at first but well worth the effort. The elongated diamond shapes, with three pearls suspended at their centres are striking. The extra detailing of handmade wire heart links and more pearls at the neckline, perfectly balance the black heart focal charm.
Kelly is an accomplished Kumihimo beader
 and has been combining her designs with wirework. The vibrant colours she uses are gorgeous and she very kindly demonstrated to the rest of us how to use the Kumihimo tool to produce this effect. I think her 
 friends and family are going to be happy with Santa's pressies this year!
Last week we covered basic stringing and how to finish off when using tigertail thread. 
Kelly has already been practising making designs in this style, as shown here in this lovely grey and silver set.
Multi stringing is difficult as you need to measure each string carefully so they all 'sit' in sequence on the wearer. Kelly has challenged herself even further by placing larger beads at equal intervals along the lengths. 
A design like this takes planning, careful measuring and lots of counting beads.... A job well done I say ! 
Everyone has worked hard to learn as many new techniques as possible over the last 10 weeks and  there's lots more jewellery they are working on.
It's been a pleasure getting to know all the ladies 
and see their designs and skills develop,
 I look forward to seeing what they all make next!


Tuesday, 15 October 2013

Making jewellery Magazine Issue 60

Lovely to see my latest creation for Making Jewellery Magazine mentioned on their Crafts Institute blog, (click here to view).
Making Jewellery Issue 60 out 17th October
Main project: Brooch & necklace
Extra project: Ring
Extra project: Sterling silver earrings
I really enjoyed making this design as red gerberas were my wedding flowers, all the way back in 2000. I even had my cake maker (Mum!) replicate them perfectly, in icing, for the cake.

When I saw a potted gerbera plant with the same deep red colour, I immediately bought it for my garden. It was the morning dew drops on the velvety petals that gave me the idea for the project.
They look bright pink here but in reality are a deep, lush red.

The wirework is much simpler to create than first appears, Start with a long length and bend it into  a wire 'petal' shape. 
All the steps to create the finished design are featured in the latest issue of Making Jewellery Magazine, along with lots more projects for you to be inspired.

Thursday, 10 October 2013

UP-CYCLED JEWELLERY

It's been ages since I posted any news on here but that doesn't mean I haven't been busy! Back in September, I was delighted to be asked to contribute to issue 57 for Making Jewellery magazine , this time for a designer profile. 
Jewellery really is my passion and it was nice to reminisce about where my enthusiasm for making my own pieces started. For me, my love affair with sparkly adornments really did start when I was a young child and I think was fuelled by having two older sisters who could wear pierced earrings! I wanted my ears pierced so bad when I was 7 years old. I'd spotted a pair of fan earrings on a stall at the open air market and had become obsessed...they actually opened and shut... "how fantastic" I thought, but they couldn't be mine, I had to make do with a  pair of old fashioned clip-on cameo studs...oh the shame!!

Look on ebay for similar designs
Well I nagged my Mum and after promising faithfully to be responsible for looking after my ears (the smell of TCP takes me right back), I was allowed to have gold studs rammed through my ear lobes on my eighth birthday. And the fan earrings became mine. Of course it wasn't long before I became bored of them and took them apart, one to be transformed into a necklace pendant and the other an accessory for my Sindy dolls. I'd already started making my own jewellery pieces by the age of 8 or 9 and was fascinated by how elaborate pieces were created and set out to see what I could do. My sister helped me make earrings with wire and neon bright coloured plastic shapes that were pretty ugly I'm sure, but I thought beautiful. I progressed to collecting old jewellery and breaking it up to make new things. Although I've (hopefully!) improved my skills over the years, I still love re-purposing old accessories and am loving the latest 'up-cycling' trend.

Up-cycling is a  much better word than re-cycling when it comes to jewellery, It's all about giving things a new lease of life, a new interpretation. There are some fantastic examples online (check out this fab site - Helen Makes Things) and I wholly recommend anyone who fancies giving jewellery making a go, starts with a bit of up-cycling.

We started our new LIFESTYLE class at Bedwas Adult Education Centre a few weeks ago and I welcomed four new students and one returner. I've set them an on-going task to create an up-cycled design of their choice. We also looked at how to create a Vintage effect and this style can be incorporated into their chosen item. Making a design using old parts or found objects is more challenging than using all new and I hope will give the learners a chance to apply their new, basic skills and meet problem solving head on. I'm interested to see the colour options they go for and how they mix the new components and findings with the old.

I trawled the charity shops myself recently for some inspiration and will be tackling my own examples as we go along. Here are a few ideas and some quick results.
Selection of charity shop jewellery & old buttons I've collected over the years


Chain, beads, buttons, ring and locket all up-cycled from old items.

Old brass bracelets sourced at charity shop combined with buttons and semi precious beads. Wire wrapped with gilt plated wire


These rings were great fun to make, simply use old earring parts, cut off stud backs and glue onto ring blanks with epoxy resin glue.
When you start planning an up-cycled design, gather everything you think may be useful and do various layouts before you begin. Don't get hung up on things being too symmetrical either. Part of an up-cycled design is the mix of items. Don't be afraid to incorporate unusual items too, such as old keys. Steampunk designs are popular now to and if you like the idea of using watch cogs and metal objects then get some inspiration from Jema Hewitt here